Monday, July 28, 2014

Home Again

Last week the hubs and I were in Austin, Texas, visiting our son, DIL, and two grandsons. Of course, it's always good to visit family, especially when there's a gurgly, grinning baby who demands attention.

Austin, baby LJ's older brother, simply adores LJ, and visa versa.

We went to the pool a couple times,

visited the Bob Bullock Texas State History Museum,


and ate Texas barbeque! Our son and DIL are wrapping up the purchase of a house, so we're looking forward to our next visit when we'll stay in their dedicated guest room, and enjoy their deck view toward Hill Country.  

While at the Austin Ikea (technically in Round Rock) this Raskog cart, in turquoise, had to come home with me.  It's the color for my sewing room, isn't it? Stash fabrics that came home with me are on the cart. 

They are: Ikea's "Smaborre" print (top) which should make a nice quilt backing; and prints in my favorite colors from A Quilter's Folly which is just a few miles from where our son and DIL live now. I'm stash-building, you know.


During the two 16-1/2 hour car rides to and from Austin - we stopped eight to nine times going and coming - I stitched a lot! I'm so pleased to have finished EPP'ing the the Flower Ball center

I've begun auditioning background fabrics. Forward progress. Linda

Friday, July 25, 2014

Happy Together, and Other Happies

You might remember that I completed this quilt top a number of weeks ago. But after studying it, and then chatting through it with "my design advisor" Anne at SpringleafStudios, I decided to buy some more of the fabric and replace the side borders. Those hot pink blooms were too distracting.

Here is the same fabric called "Brassica" by Philip Jacobs - just cut at different places in the yardage to make replacement side borders. I like it much better!

I've prepared the backing for this 68-1/2" X 68-1/2" top using a tone-on-tone print I bought at Craft Depot when visiting Sydney, Australia. I think this choice is entirely appropriate since the appliqué blocks were made by talented Australian, Julia.

Doesn't the fabric print bear a strong resemblance to Maori (New Zealand) designs?!

I'll again use a double batting - Quilter's Dream poly, and Quilter's Dream wool - to make the quilt sandwich.

At our July 14 CentralFloridaMQG meeting Gloria shared her "quilt story" that began with a family of quilters. This antique quilt is made with a block that appears to be a variation on a Churn Dash. When I got home, I grabbed my Barbara Brackman book, Encyclopedia of Pieced Quilt Patterns, to search for the block and its name. It goes by both True Blue and Prairie Queen. 

I had to try it with modern fabrics! Both blocks are made with solids and Terra Australis by Emma Jean Jansen. I love this block! I think I see a whole True Blue quilt in my future. 
True Blue, 12-1/2" X 12-1/2" unfinished
Another quick thing I made is this Ultimate Summer Hexie Coasters, an English paper-piecing design by CraftyPod, for Robert Kaufman. The pattern is intended to encourage quilters to buy a pack of pre-cut Kona hexagons to make these 5-1/2" X 6-1/2" coasters.

Since I already have lots of solids, I made my own version. Using card stock, I printed 1-1/2" (the measurement of one side of the hexagon) hexagons which are smaller than the 1-5/8" hexagons in the tutorial download. Eight hexies are needed for one coaster. Also, instead of cutting hexagon shapes, I used this Paperpieces chart to cut fabric squares. See the aqua hexie below. 

This is such a clever design, though it looks quite odd as the pieces are whip-stitched together. But it turns out so cute! From one point across to another point, my coaster measures 6".

Whether you make only one coaster, or a set of six or eight, I recommend this as an ideal project for first-time English paper-piecers. Linda 

Wednesday, July 23, 2014

DIY Computer Chair

I recovered an office chair! I was intimidated, but gathered the courage to do this (while hubby was away for the day!), and I'm glad I did. This lifeless-looking thing has been around for at least ten years, and was overdue for an update.
BEFORE
Basically, I followed a tutorial by PracticallyFunctional that I first saw on Pinterest. However, as with all DIY projects, as I went, I realized I needed to make adaptations. My chair isn't put together like the one in the tutorial. So, I found that even taking the chair apart was a bit of a challenge. 

The seat came off the frame, but not without a few screwdriver scrapes. 

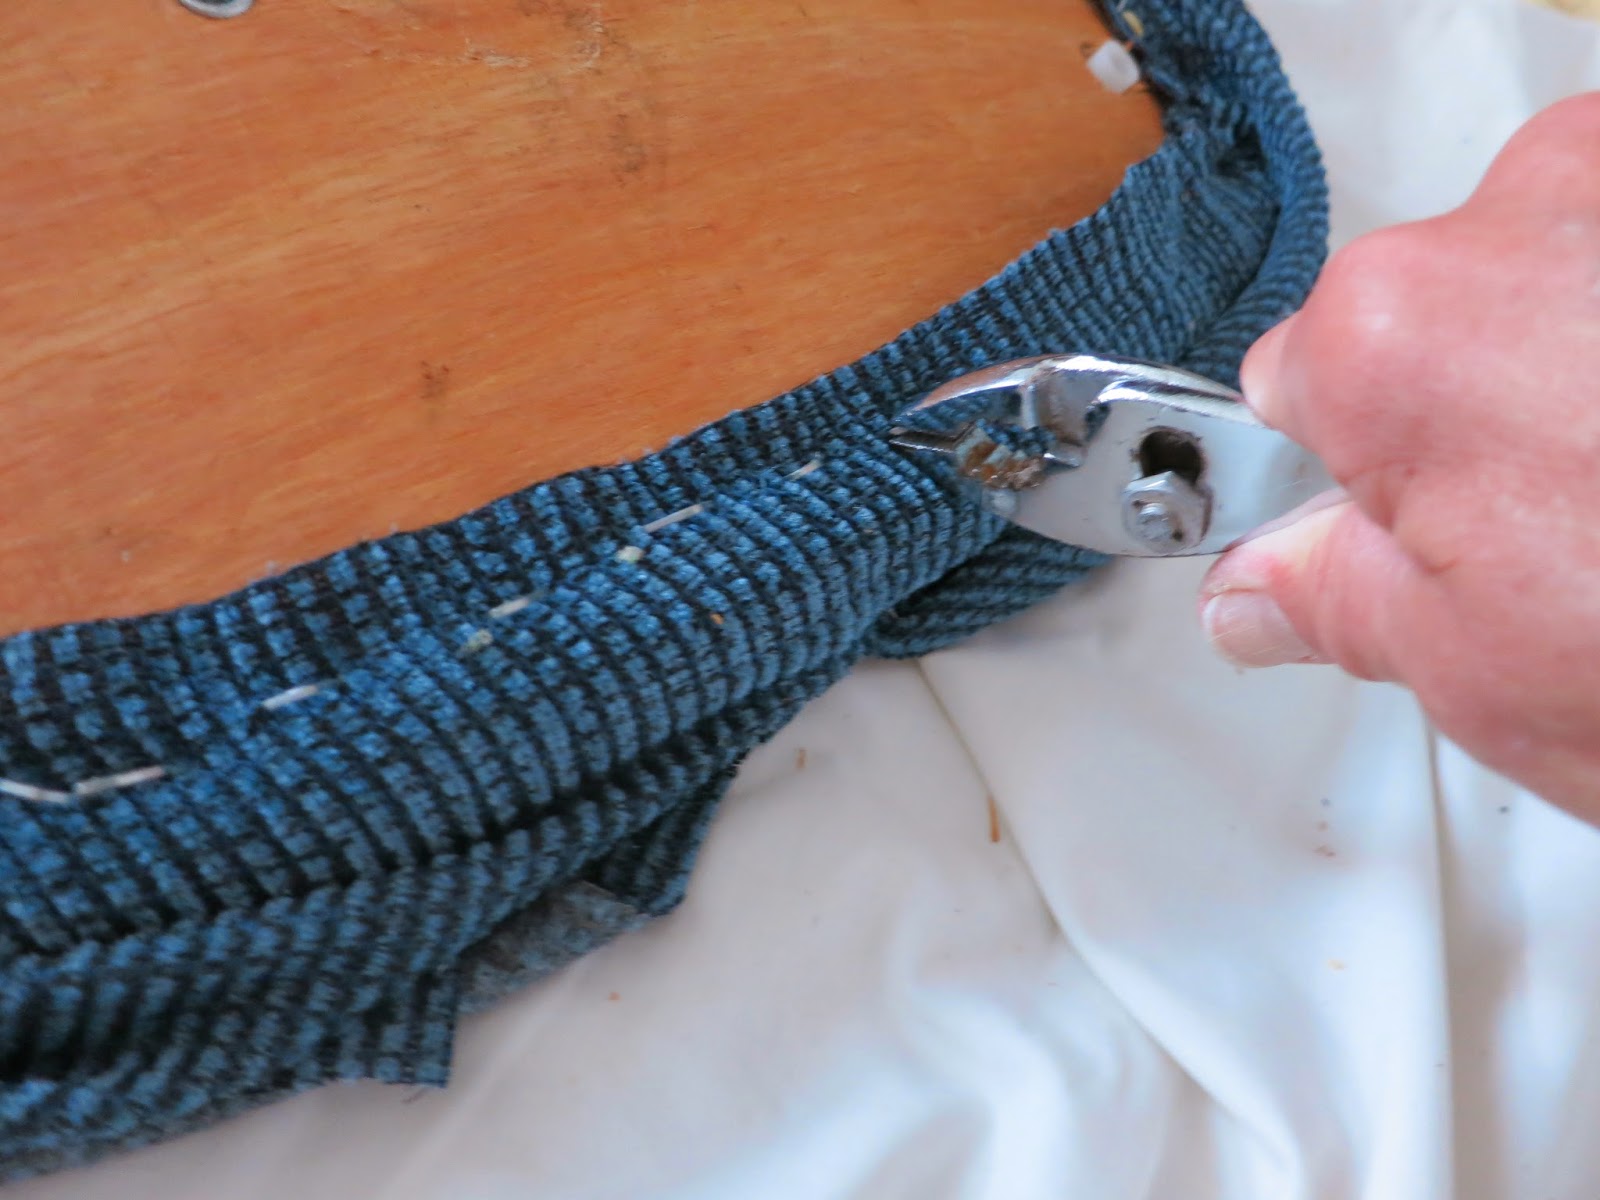
At least a hundred staples had to be removed.

I learned that it was easiest to remove them this way. The edge of the seat became the lever for the pliers to push down against, to "roll" and lift out the staples.

The trickiest part was figuring out how to get the cushion off the seat back! Mine didn't have obvious screws, as in the tutorial. I finally did a Google search and found someone who had a chair like mine, and figured out what to do - cut through the fabric of the seat back and cut through the foam to reach the plastic plug/screw set that would release the seat back board from the plastic back. Whew. 

I had one inch-thick foam on hand from which I could cut a new piece for the seat back.

At one point, I began to wonder if I would be going out to buy a new office chair!

Determination saw me through. I love this home dec seat back fabric - notice how I centered the print?! It's a leftover from the cover I sewed for Hogan's window bench in July 2012. I wish I'd had enough of this print to cover the seat too.

But I kept it economical, and used another leftover home dec print in leafy aqua. Now we're not only sitting prettily, but also more comfortably because I put a one inch layer of foam on top of the original foam seat.
AFTER
As a practicing DIYer, PracticallyFunctional said her chair took one hour to re-cover. I lost that contest!  Still, I'll pat myself on the back for my three-hour finish. Linda

Monday, July 21, 2014

Bee Block

Do you get blog-moody like I sometimes do? Maybe because it's summertime, maybe because we've frequently had rainy days (like six inches one day last weekend), or maybe because I just don't feel like it, but I haven't wanted to write a blog post, or read blogs. Don't get me wrong though! I still like my blog friends! In fact, I brag to non-bloggers that I could travel just about anyplace in the world and arrange to meet-up with a blogger who I've come to know pretty well. Blog comments and swapped emails build friendships.

Moodiness aside, I've spent productive time in my sewing room, especially on rainy days.

Always a beginning-of-the-month priority is to make the queen's block for our Mid-Century Modern Bee. Our July queen is Susan who lives in Australia, and blogs at PatchworknPlay. She asked for a 12" star block. The star could be our choice as long as it has a black background and any clear color prints. I selected the Blazing Star block on Jinny Beyer's "Free Block Patterns" website. To make sure the points met perfectly in the center, I hand-pieced it, and used a wall paper seam roller to press each completed seam.

You can see in this close-up that the black background is a cool "Target" print. I found this Timeless Treasures fabric - in both black and white - about six years ago, and bought five yards of each color. It's proving to be a timeless (catch that pun?) contemporary print.

So Susan remembers that this block is the one I contributed to her quilt, I made it in my very favorite colors.
Blazing Star, 12-1/2" X 12-1/2" unfinished
If you know me very well, you're aware that I'm crazy for popcorn. Not the microwaveable kind, but the good 'ole fashioned kernel-type that's popped in oil in a Whirlypop on the stovetop. I think this cartoon is a good mood-lifter, especially if you're experiencing the summer heat.

Linda

Wednesday, July 2, 2014

Bits of This and That

Since I haven't been teaching lately, my sewing room has seen me a lot.

I finished piecing this 62" X 62" quilt top. I meant to be done with it, but after sharing pictures and swapping emails with my talented designer-friend, Anne of SpringLeafStudios, (Check out her latest pillow design that's on the cover of Modern Patchwork magazine!) I agreed with her assessment that the big hot pink blooms in the side borders are a bit distracting from the beautiful hand-appliqué on the inside - appliqué done by Julia in Australia.
Happy Together, 62" X 62"
So, I've ordered more of the border fabric ("Brassica" by Philip Jacobs) and will be sure to cut the print from the areas that are more similar to the top and bottom borders. Such a happy quilt! Yes? Speaking of "happy," I've named it "Happy Together," not only for the bright colors, but because this is a shared project between Julia and me. Quilting will be fun as I'm imagining curved cross-hatching behind the appliqué, and feathers, using holographic Marathon threads.

In the meantime, I'm quilting a 78" X 78". Wanting large spirals, I rounded up everything in the house that's larger than 12" in diameter. Believe it or not, I used the 23" diameter glass top of a round table to outline a circle on the quilt! I also used an 18" wall clock, and the lids of two Tupperware containers, for 14" and 13" circles. These are the circles made with freezer paper so I can press them to the quilt top. We gotta get creative sometimes, don't we?

Here's some of what I've been quilting using the free motion quilting foot - not a walking foot. I have to eyeball the distance between the curves, so they aren't perfect. But I sure like the texture which I attribute to the double batting - Quilter's Dream poly and wool. I'll be working on this piece for a week or so.

In the mail we received these hand prints that are now beautifully gracing our refrigerator.

Here are the guys who made them. I miss them so much!
Austin, and five month-old LJ
While I can't imagine living without the technology that gives me immediate pictures and FaceTime, nothing beat being IRL - in real life. How else can you kiss those adorable cheeks?! Linda

LinkWithin

Related Posts Widget for Blogs by LinkWithin